Hot Grips, Grip Puppies or Hot Puppies?

Hot on the heels of the last post, here we go again, with the next little problem to work on. It looks like the bad wrist isn’t going to recover much more now without an operation, and Dog knows when that’ll happen. So I’ve been pondering how to reduce the load (torque) my poor old wrist feels at the twist grip.

It seems to me there are two ways to do this ….. firstly, increase the diameter of the twist grip to get more leverage, the second is to replace the cam at the throttle body to do the same job (more on this later) – or maybe a combination of the two! So let’s look at the first option.

The Aprilia heated grips (with replacement Ariete grip rubbers) are 32.8mm diameter and probably the cheapest and easiest way to increase this would be to simply fit a set of Grip Puppies. But the fact is the Aprilia heated grips are quite poor when it comes to output. The 13Ω elements are really only any good for chilly Spring, Summer and Autumn mornings and certainly don’t do much on a freezing Winters day in the UK. So I started to hunt around for a better heated grip with more power. In the end I opted for a set of Oxford Products Premium Adventure grips (OF690).

These grips are approx. 35mm diameter, so that’s one box ticked, and they have heater elements averaging approx. 7Ω …… that’s almost half the resistance and will mean twice the output. The grips are 132mm long and can be trimmed if necessary down to 122mm, so fit shouldn’t be an issue.

The heat adjustment is in five steps (30%, 40%, 50%, 75% and 100%) using PWM (Pulse Wave Modulation). In other words, a microcontroller turns the power on for a certain percentage of the 1.3 second cycle ….. so 75% output means the grips are on for approx. 0.975 seconds, then turned off for 0.325 seconds – total 1.3 seconds – then the cycle repeats itself. Now this is all well and good but they really missed the mark to my mind. Microcontrollers are great little gadgets and can be programmed for all sorts of things and as far as these grips go, they only scratched the surface. First off, when you turn off the grips they turn back on at the default 30% or 100% if you hold the button down – NEVER at the last setting you may have been using*. Secondly, a rapid warm up would have been nice, say 100% for 2 minutes at start-up, then back 
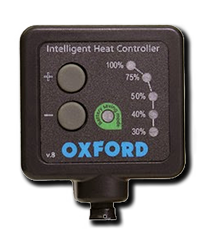
to your last used setting ….. but none of this is programmed in on the OF690.

In fact isn’t it about time grips came with temperature sensors in-built? Think about it ….. set the desired heat and ride along happy as larry with toasty fingers on a bitter winters day. Stop for a minute and take your hand off the grip and it now cools rapidly – the cooling temp sensor feeds back to the controller, which now ramps up the output to try and restore the grip temp back to that desired. You then plonk your size 10 winter mitt back on the well heated grip, and now the grip is insulated the system reduces power to maintain the temperature. And it goes without saying that both grips should do this independently!

Anyway I digress, the whole point is that the new grips will give me a welcome increase in diameter, even then I have the option to add Grip Puppies over the top but I think this might be overkill! But who knows ……

Next post I’ll look at the pro’s and con’s of changing the cam at the throttle body to achieve a reduced torque at the twist-grip.

*This function along with 9 heat settings instead of 5 is available on the Hotgrips Advanced Adventure UK SPECIFIC (EL690UK). Why didn’t I buy these? Simply because I got the OF690 set for £30 cheaper! 😀 

Ognibene sprockets

The first Ognibene (7164-16) 16 tooth front sprocket was fitted last April, since then its done over 18,000 miles and I’m happy to say, still has some life left in it. In comparison to the excellent Renthal sprockets that I’d used since the OEM one wore out, I have to say I’m very impressed. Yes they cost a couple of pounds more that the Renthal, but it has covered more miles. The Reynolds typically averaged (15,000 miles), making the Ognibene’s running cost slightly better pence-per-mile wise.

Now a matching set of front and rear (8098-45) sprockets are going on, along with a nice new gold/gold DID 525-112 ZVM-X chain. Aprilia Caponord ETV1000 Rally-Raid Ognibene front sprocket 7164-16The France Equipment rear sprocket (1683-45) I fitted last year is still looking pretty good, so it’ll go on the shelf as a part-worn spare.

One thing that’s maybe worth mentioning about Ognibene sprockets is to be aware that the ‘silent’ bands will bed-in over the first few miles. Initially the chain side-plates ride up on the hard plastic bands before sinking in – changing the effective diameter of the chain’s run around the sprocket ……. this means your chain adjustment has to be monitored more carefully at the beginning Aprilia Caponord ETV1000 Rally-Raid Ognibene 8098-45 rear sprocket and DID ZVM-X chainand will no doubt require a couple of tweaks. Once everything beds-in I guess it’s business-as-usual with regards to the long intervals between adjustments that I like about the DID chain.

New chain and rear Ognibene sprocket courtesy of Motrag at a very competative price. Unfortunately they could only supply the 17 tooth front, not the 16 tooth…… that may change in time.

More bunged up …… or spoke too soon!

Aprilia Caponord ETV1000 Rally-Raid spare spokes in the front wheel spindle - AP8108784, AP8108787, AP8108805I’ve been carrying six spare spokes around in the front wheel spindle for years ….. however the whole thing was a bit of a mash-up and not worthy of a post on here unless I desperately wanted some serious ridicule. Until now that is! Out with the hand-cut foam and insulating tape and in with the nice new 3D printed parts – two spacers to hold the spokes all nice and even and two new symmetrical end caps. All this held together with a length of 8mm aluminium tube, two ‘O’ rings and two M6 stainless fasteners topped off with a pair of decorative washers I had left over from my old Honda Blackbird days. All works pretty well, even if I say so myself! 😀 

Feeling a little bunged up

The Capo now has 3D printed bungs in the swing arm pivot and the ends of the crash-bar mounts. They’re held in by 43-39-2, 14-10-2 and BS011 ‘O’-rings. And yes, the BS011 rings are the very same as those used on the fuel lines. So one day if the old girl springs a leak and needs a new fuel line ‘O’-ring by the roadside – no problem, whip out a crash-bar bung and pinch the ring!  Next ….. front and rear axles then the engine mounts above the swing-arm pivot .

New closure panel and heatshield

Aprilia Caponord ETV1000 Rally-Raid headlight/dashboard closure panel AP8168916 in CADI finally got around to finishing off the new closure panel (AP8168916) and seat/tank heatshield (AP8117201 – now unavailable) using the 2mm rubber sheet I bought a few months ago. A single 500mm x 500mm piece is enough to make one each of the panels at a cost of about £4 per panel. Compare that to the list price of Aprilia replacements – £15.58 & £22.48 each PLUS VAT!

Next I’ll have a go at part AP8158254, the shield that fits over the two front lugs holding the airbox to the coil mounting plate. Mine split (at the lugs) years ago and I can’t find it anywhere to make a template from it, so I guess I’ll keep looking for a second hand one on Fleabay that I can use as a template instead ……. unless anyone has a spare they’ll loan me to make a drawing from?

Aprilia Caponord ETV1000 Rally-Raid closure panel AP8158254

She’s let me down!

Aprilia Caponord ETV1000 Rally-Raid broken keyWe called into a fuel station about 20 miles from home just as a thunderstorm was rolling toward us over the Gran Sasso mountains. It rumbled away as the sky drew ever darker while I filled up a 5l gas can for the mower and topped up the Capo’s tank. All done, time to head on ……. except the ignition wouldn’t turn. One look and my heart sank – 2/3 of a key winked at me from between my gloved fingers. Yes, the other third is still in the fuel tank!!

Long and the short of it, Jan drove over with the spare and I was on the road again. I have to say that 20 miles heading home under a pretty pissed-off thunderstorm is not really much to chuckle about, but it did remind me of the last few weeks in England! Once back in the barn, time to fix the problem. Stripping the cap didn’t help. The barrel looks like it’s fitted once and fitted for life, so no getting the bit out that way. OK, maybe a locksmith can do the job, but at what cost and what state would the lock be in afterwards? A replacement Aprilia cap (AP8104529) then? A quick search shelves that idea – €277 you have to be bloody kidding me! So how about aftermarket? Well it looks like Oberon make a nice key-less cap for £79.99 that fits. It looks good and folks seem to like Oberon quality, so maybe that’s an option. I’ll think about it.

Anyway, for now I’ve refitted the cap and it opens/closes just fine with the broken key. Tomorrow I’ll get a couple of replacements cut from the spare and mull over what to do next. Meanwhile lessons learned:-

  • Carry a spare key or squirrel one away somewhere on the bike – Andy (Beasthonda) gave me a good idea on that one – cheers Andy!
  • Give the key a once-over every now and then with a magnifying glass … maybe I’d have spotted the cracks starting you never know.
  • Replace the key every few years with a new one …. this one was 13 years old, so no real surprise that fatigue had set in by now.
  • And no matter how short the journey or how sunny it is when I leave, throw a set of waterproofs in the (empty) panniers. You never quite know!

Oh and as a parting word …. thank-you to whoever was watching over me on the last couple of big trips. Breaking a key then would have been a real ball-breaker that’s for sure! 😕

Motrag radiator guard – UPDATE

Aprilia Caponord ETV1000 Rally-Raid - Northern Italy as day breaks!The Motrag radiator guard has been on the Capo for about 6 weeks/4,600 miles. In that time it has been through driving rain, blazing sunshine and a temperature range of 7C to 35C. Not exhaustive, but a reasonable range of conditions and mileage on which to update the original review.

I don’t know about your Capo, but mine has always had a bit of ‘character’ when it comes to engine-temp versus ambient-temp. Below 25C ambient, the coolant will read a rock-solid 75C day in, day out. But as soon as the ambient temperature begins to rise above 25C, so will the engine-temp. By 35C outdoors, the Capo will run at no lower than 78C AND get hot under the collar when stationary far quicker. Quite understandable and besides, it has done it from day one and never changed – even when the coolant has been!

So how did the guard fare?

  • Quality: Superb! It looks as good now as when fitted. No corrosion or stone damage to the powder coated mesh that I can see.
  • Fit: Adhesive pads are still firmly attached to the radiator after undergoing wide temperature variations and vast amounts of rain!
  • Aprilia Caponord ETV1000 Rally-Raid Motrag radiator guard / protectionAffect on cooling: With ambient temperatures below 30C no noticeable difference in day-to-day running. Above this temp, a slight increase (approx 1-2C) was noticed along with slightly reduced time to fan-on when stationary. However I’m talking a change that was deliberately being looked for and based on years of experience on my Capo ‘as standard’. The fact is the difference is subtle and hardly noticeable at all and most certainly NEVER causes an issue.

Conclusion: This is a quality product at a good price that does the job intended and (to my eye) looks jolly nice as well. Protection, durability and aesthetics for under €70 can’t be bad in my books …. and if your reading this Manuel, bag up another one please for the second Raid! 😀

motrag.com – Radiator guard €64.95 inc. tax

On a roll ……

With the rear indicators looking wayyyy better than before, it was inevitable that I’d end up casting an eye over the fronts. As mentioned previously, the Mana indicator stalks are too short to fit at the front …… but with a spare pair of standard stalks to hand, I could at least see if it’s feasible to cut them down.

This is the end result and I like to think it has been a success and complements the rears, so here’s how I did it. Hopefully it’ll be of some use to you if you decide to shorten your own.

Aprilia Caponord ETV1000 modified front indicators

I used a Dremel to cut the stalk at the two points shown in the picture below, then carefully flatten both surfaces as these are going to be bonded back together – so flat and square to each other is the order of the day! This removes approx. 24-25mm of the stalk.

Then I used a piece of aluminium tube (8mm OD x 6mm ID x 50mm) that I pinched in the vice to make it very slightly oval – not too much mind. This was then press fit approx. 35mm into the main section leaving 15mm exposed. The short section was then bonded onto the exposed tube. Using a syringe I also ran adhesive down the gaps between tube and stalk, this ensures that both sections are well and truly bonded and the aluminium tube also provides some extra strength to the whole assembly.

Caponord ETV1000 Rally-Raid cut down front indicator stemAprilia Caponord ETV1000 Rally-Raid shortened front indicators

To the Mana born

Aprilia Caponord ETV1000 Rally-Raid with Mana indicatorsDeep in the bowels of the Motrag box of goodies are a pair of indicators for an Aprilia Mana – identical body, lens and bulb as used on the Rally-Raid and standard capo 04-onward, but with a greatly reduced stalk length.

Aprilia Caponord ETV1000 Rally-Raid - Mana indicators & Hepco Becker pannier latchWith only very minor modification, these can replace the existing long-stalk indicators on the rear of the Capo, unfortunately they are too short to replace the fronts as well. The mod is so subtle the old indicators can be refitted no problem. When fitted the indicators have much greater clearance from the pannier latches, which makes removal/refitting the pannier easier and they are now well within the width of the pannier rail –  so dropping the bike (not a recommended pastime!) should greatly reduce the chance of a broken rear indicator.

Simply pop off the lens (one screw), prise out the reflector/bulb assembly and disconnect the two wires. Now remove the screw/nut/washer holding the stalk to the mudguard and ease it away while wiggling the wires out. Now the first of two minor modifications are required.

The indicators are held in place by the screw/nut/washer AND a tab that hooks behind the mudguard itself, except on the Mana stalk the tab is too narrow. A quick bit of work with a Dremel soon has that sorted (open gap to approx. 4.5mm). Now the second modification is to extend the slot in the mudguard ( extra 5mm) where the screw passes through. This mod does NOT affect refitting the original indicator as the footprint of the stalk is identical in both cases, so the slot extension is covered by the base of the indicator irrespective of which one is fitted.

Aprilia Caponord ETV1000 Rally-Raid with Mana indicatorsOnce sorted, simply reverse the removal stages – slot in the new stalk and fasten up the screw, nut and washer. Re-thread the two wires back down the stalk and attach to the connectors on the reflector, then screw the lens back in place. Now repeat on the other side, then bask in the warm glow of a job well done, in fact a cold beer goes down a treat about now ….. Ahhhh Mana from Heaven! 😀

NOTE: The indicator bodies are LEFT and RIGHT handed, look at the recess between body and lens – this is the drain and needs to be on the lower edge. I’m not saying I put them on the wrong way round or anything so numpty, perish the thought! 😳

Aprilia Caponord ETV1000 Rally-Raid fitted with Mana indicators


Review – Motrag ETV1000 radiator protection

Aprilia Caponord ETV1000 Rally-Raid Motrag radiator protection/guardYesterday a whopping 15Kg parcel of goodies from Manuel at Motrag turned up. Although the box was bursting with new toys, I just focused on the one part I’d really been waiting for – the lovely stainless-steel radiator guard. I know Motrag have had lots of interest in this, which stands to reason with the Touratech guard no longer available. The only other alternative seems to be one from Ebay that could easily be copied for an awful lot less money – after all, it’s only aluminium mesh with a rubber strip and held on by zip-ties.

This guard is made from glass-shot V4A stainless-steel (equivalent SAE316 for harsh environments) with powder coated aluminium mesh bonded to the frame and weighs in at approx 750g. It is held in place by two Scotch ‘Dual Lock’ adhesive fasteners at the top of the radiator and the two fastening points that the ‘cooler spoiler’ (AP8139628) mounts to at the bottom.

Installing the guard is very straight forward …. remove the crash bars & cross brace (if you have them), side panels and spoiler panel. I also removed the tank while servicing the bike which does make access even easier, but isn’t strictly necessary. Give the radiator a good clean and take a few Aprilia Caponord ETV1000 Rally-Raid Motrag radiator protection/guard & fog lamp bracketsminutes to carefully bend back any fins that have been damaged by stones or jay-walking deer. Then clean and thoroughly de-grease the top of the radiator on both sides. The guard has about 1-1.5mm clearance either side when in position – I used a couple of split pins as spacers to make sure the guard was nicely positioned. Do a dry run so you get it located just right and then when you’re happy – whip off the adhesive pad protection and fit the guard for real.

Next up, I had to bond a couple of spacers onto the clips where the spoiler/guard mount –  these take up the space between clip and the new guard. They can’t really be fitted when reassembling the spoiler as access is difficult – hence bonding them onto the clip first. Motrag will be supplying the adhesive in the kit! I gave it 1/2hr to dry, then began the rebuild – crash bar cross-brace, tank, panels, spoiler and finally the crash bars themselves ….. another 20 mins tops.

So, the verdict. Easy to fit with no modifications required. The fit is superb and the stainless frame is nice and stiff, so no worries about vibration induced scuffing of the radiator. As always, the Motrag attention to detail – fasteners and instructions is 100%. If there iAprilia Caponord ETV1000 Rally-Raid Motrag radiator protection/guard & fog lamp bracketss a negative anywhere to be found, then some may question the weight … to me the Capo is a big old lump anyway, a few extra grams won’t snap the frame!

Of course aesthetics are a personal matter, but to me it looks good and is definitely in keeping with the spirit of the Rally-Raid. That just about covers fit and form, but what about function? Well I admit I’ve yet to turn a wheel with the guard in place, but I know Motrag put plenty of miles on a pre-production one and had no problems, so I’m confident it’ll work just fine. But just to be sure, I’ll post again in a few weeks when the Capo has another 3-4K miles on it.

These guards are on sale now over at motrag.com for €64.95 including tax. That’s about half the price of the Touratech guard before it disappeared off the website!