Cam chain tensioner – part 2

Aprilia Caponord ETV1000 Rally Raid cam chain tensioner AP0236252Sorting the rear tensioner yesterday took all of 20 minutes, but I knew that the front was going to be a different kettle of fish altogether because of the coolant pipes. No worries, I thought – a good excuse to change out the coolant as well.

So in I went and oh what fun it was! Off with the crash bars, side panels and sump guard, move the coolant bottle and release the radiator bottom hose and drain the system – so far, so good. Remove the airbox and release the clamps holding the throttle bodies in the inlet rubbers ….. hmmmm – looks like they’ve got a few deep cracks I’m thinking.

Aprilia Caponord ETV1000 Rally Raid inlet manifold rubber AP0267150Take off the rest of the hoses, cables and electrical connectors, now a gentle pull and twist to release the throttle bodies and ……………… oops! I think the cracks in that rubber were a tad deeper than first thought and a touch beyond repairing with a splash of rubberised goo. Luckily I’ve a spare pair to hand from the l’Aquila stash. However, this momentry inconvenience isn’t the task of the day ….. so onward once more. Hoses, cables anything and everything moved so I could at last get to the two clamps holding the ‘Y’ hose in place  – then finally the goal was in sight, the pot at the end of the rainbow …. the front cam chain tensioner!

Aprilia Capononrd ETV1000 Rally Raid inlet manifold rubber AP0267150With a heave, a grunt and too many fingers trying to get into too small a space I managed to retrieve the tensioner from its hide-away, gave it a squeeze and ……… it was fine, solid as a rock! Never mind, a flush to clean out any debris and a refill with clean oil never hurt.

Then it was rebuild time. The tensioner’s in place and the cap torqued down to 30Nm with a swanky new copper washer. The super-shiny inlet rubbers torque down at 19Nm and the rest of course is then a reversal of strip-down – with the intention of NOT ending up with any washers, screws or clips left over! And so with the sun ready to slip behind the mountains it was test-time. Glad to say she fired up first hit of the button and sounded so much smoother, funny how you get used to little noises and ‘character’ over time – now she’s idling smooth as can be, a tweak on the throttle body sync screw had the manometer within a couple of mills AND it stayed that way when the motor was reved, something it didn’t do last week. So I’m guessing the cracked inlet rubbers were an issue after all! 😳 So that’s it for today, other than updating the Capo’s history spreadsheet ….. the Capo has now done a pinch over 74,400 miles and other than a couple of valve shims and plugs, it’s the only work the motor has ever needed.

Next stop – tyres, chain and sprockets. 😯

Cam chain tensioner – part 1

Aprilia Caponord ETV1000 Rally Raid airboxYesterday I spent a lazy morning installing a couple of sensors inside the airbox (more in another post) and with the tank propped back in place, fired the Capo up to check the fuel lines…….

…… and just for a second or so after she fired up there was a distinct rattle from the rear cylinder and frankly it didn’t sound too special as the bike warmed up. To be honest, I’d heard it before on a couple of occasions but couldn’t pin down which cylinder it was. With the tank lifted and stood in just the right position, it was obviously the Aprilia Caponord ETV1000 Rally Raid cam chain tensioner AP0236253
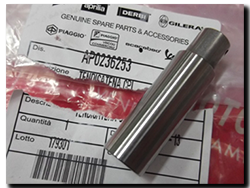
rear. As it was lunch time, I decided to have a look a bit later – and promptly forgot! Well I got back to it in the evening and pulled the cam chain tensioner out. Soggy as a knackered bed spring! 🙁

So it had a thorough flush out and re-charge with fresh 15/50w oil and firmed up nicely (phew!) …. it looked as though contamination had built up in/around the ball that seals the oil in, in this case letting it out just as easy. Buttoned it all back together, fired the motor into life and revelled in a quiet(ish) Capo motor – just in time for a cold beer and MotoGP on the box, bliss! As I sat watching the race I kept having a niggling thought … what if the front one is the same?

Tomorrow feels like a let’s-check-the-front-one day ……….. 😕 

All things being equal

gaugeIt’s been a while since the Capo was serviced and one job has still remained outstanding – in fact it has been ‘outstandingly’ outstanding for the past few services since I lost my old Davida vacuum gauge set! Yes, the perplexing throttle-body synchronisation*. Truth be told, the Capo has been running just fine for ages, but it never hurts to check it once in a blue moon!

I wasn’t about to lay out a fair-sized wad of cash for another (excellent) Davida set or buy a Carbtune II again in a hurry, so I thought it was about time to go the Poundland route and build my own manometer for a few pennies and with a bit of scrap kicking around the barn. The nice thing is that there’s a mountain of info on the internet about how to do this yourself, just pick what suits your needs best and modify for your own bike.

So what do you need? Well just a sturdy board, door or wall on which to mount the kit, a length of 6mmID clear tube, a suitable liquid and a way to connect it to the bike. That’s the nut’s and bolts of it, but a simple addition will make the setup ‘user friendly’ as you’ll see later. Although the tube is straight forward, the liquid is a bit more controversial …. Some say coloured water, some 2 stroke oil, some EP90 gearbox oil …… you get the idea! I chose some good old Scottoil Blue. Why? Because it was on hand, because it is basically ATF and has a fairly low viscosity, because IF it gets ingested by the motor it won’t cause any damage and because it turns out (purely by chance!) to work REALLY well!

*Workshop manual page 4-18-00

Now for a bit of physics ……

OU-1970's-styleFirst off, what kind of vacuum are we looking at from the Capo motor? From measurements, it looks to be somewhere in the range of 22-24cmHg (based on an erratic Carbtune II) per cylinder measured against atmospheric pressure …. Now that’s not much for a mercury manometer – barely the length of a sheet of A4 paper. A nice compact manometer then, except that unfortunately mercury is almost impossible to get hold of because it’s deemed way too dangerous for us potato-heads to use safely. So what does this mean in terms of manometer height if we use liquids of a lower density? Well…..

Mercury 22-24cm (Ideal!)
Water 299 – 326cm (free-ish and known density but hard to see at a distance)
Light oil 345 – 376cm (coloured – easy to read, density varies on type of oil)

20150413_manometerSo here’s our first problem …… measuring each cylinder individually will require a water manometer at least 3.5m tall and an oil one even taller, clearly not exactly practical or compact! The solution? Well the Capo comes to the rescue …..

Being a twin, the Capo simply needs a differential setup – that is, measure both cylinders against each other, not against atmospheric pressure. In theory they should cancel each other out if perfectly balanced and so the manometer would read zero. Any imbalance will have the liquid slightly higher in one tube and lower in the other …… so by measuring differential pressure we don’t need a manometer anywhere near as tall, but remember, even small differences in pressure will make big changes in liquid level, so the manometer still needs to be quite tall. In the end I built mine on an old wardrobe door – a total height of  155cm, with about 60cc of Scottoil filling about 40% of this. With hindsight, it’s about twice as tall as it needs to be, but hey you live and learn!

Putting it to use …..

20150413_monoWith the Capo nicely warmed up after a little ride, the tank lifted and the manometer plugged into the Capo’s vacuum ports, she was fired up again. The oil level in the tubes drifted apart and settled at approx. 9.5cm (equivalent to approx. 0.6cmHg), a gentle nudge of the screw for the front cylinder on the throttle body saw the level drop to just below 2-2.5cm (approx. 0.15cmHg) – comfortably within the 0.5cmHg accuracy quoted by Synchromate and oodles better than the 2cmHg per division of the Davida gauges. So that’s a £2 rig versus the commercial £70/£170 rigs ……..

….. and one other thing, this was without ANY damping (valve/jet/cotton wool etc.) in the line because the Scottoil works perfectly well as its own damper. It pulses gently by no more than about 2-3mm in the tube but is viscous enough to respond reasonably quickly to changes in vacuum. Oh and that addition I mentioned …… simply two small sealed containers greater than the volume of oil in the manometer, one placed in each line. Now if either vacuum line should come adrift the container on that line acts as a trap to capture the oil before it can get swallowed up by the motor!

Arduino motorcycle vacuum gaugeSo ultimately it’s cheap, self calibrating with excellent resolution around the balance point ….. but not exactly portable! And so in typical MA fashion, the mind wanders off to thoughts of a compact electronic version. Powered by the bike, self calibrating – kind of like this one!

Oil pressure switch

Aprilia Caponord ETV1000 Rally-Raid AP0956169 Oil Pressure SwitchOver the past few months I’ve noticed the oil pressure LED getting dimmer after the initial dashboard power-on-self-test has finished. Then a couple of weeks ago, no oil light at all. If I pulled the electrical connector off the switch and shorted it to the crankcase, the lamp worked fine, so the oil pressure switch was u/s, fubar, stuffed ……….

I bought a new one from Ultimate Parts in the UK that came in a plain zip bag, not an Aprilia one and isn’t the same as the original – requiring a 24mm socket instead of the Aprilia Caponord ETV1000 Rally-Raid 0.3-0.6bar M10x1 thread oil pressure switchoriginal 21mm. As such I have a sneaking feeling this is an aftermarket part and not genuine – but sold at a genuine price! Either way, both new and old are marked as 0.3-0.6bar (4.35-8.7psi).

Swapping it out on the Rally-Raid was a simple 5 minute job – remove the aluminium sump plate, disconnect the electrical connector and use a deep 21mm socket on a short extension to clear the sump guard frame and unscrew the old unit. You’ll lose a couple of tea-spoons of oil but that’s all. Simply swap to the 24mm socket to fit the new one, reattach the connector and refit the sump plate – job done. The job’s made all the easier if you do it on the side-stand rather that the main stand as the switch is mounted on the right hand side of the engine!

Service time over

Empty tank makes for light work!Service time is over for another 6,000miles. I decided a couple of years ago to extend it from the original 4,650 miles due in part to the well documented stability of the valve clearances and because I’m using the long oil filter and a decent branded oil. Whether I’m being realistic or foolhardy for extending the interval only time will tell.  😕

Valve clearances were all in spec but on the tight-side, so no need just yet to use the new Hotcams shim kit, but next time I’ll change all the shims by ±0.025mm to shift the 0.13mm ...... getting close to the limitgap back into its mid-range. That should see the valves good-to-go for at least another 50k miles. Everything else was absolutely fine, with just a slight tweak of the CO to lean out the idle.

The rest of the bike was given a thorough check over and happily all bearings and seals are fine, a squirt of grease in the rear suspension linkage keeping that nice and smooth. The drive chain and sprockets were cleaned and checked and after 33,333 miles (yes, that’s a genuine number!) they’re still good ….. This is the highest mileage I’ve EVER had from a drive chain. DID ZVM2 chain rocks!

Air filter frolics

Athena CA8925 air filter to replace Aprilia AP8104169I mentioned recently that I’d ordered a batch of air filters made by Athena in Italy. They’re a direct replacement for the Aprilia AP8104169 one and the only obvious difference is the black foam material instead of orange, and that’s fine and dandy with me. However, on stripping out the old filter I noticed for the first time (that I can recall!), it has a code on the end …. hmmmm ….. could it be a viable manufacturers code I wonder?

Hmmm what's the code mean then Sherlock?A few minutes on the web confirmed that the number is definitely a manufacturers code – not Aprilia, but FIAAM. A bit more digging unearthed a total of three cross-referance numbers. Tecneco AR9474PM, FRAM CA9474 and FIAAM PA7301. The downside? All of them seem to be obsolete, with FRAM/FIAMM saying they went out of production in March 2012! Buggeration ……

But … one of the sites I found listed a filter that is an almost identical footprint to the OEM one:-

Aprilia OEM          210 x 140 x 30

FIAAM PA7180   212 x 140 x 60

Now a 2mm length difference is peanuts – the OEM one can be stretched/compressed by 10mm easily, the problem may well be the height, at 60mm it’s double the OEM filter. So to try to find out I took some pics of the airbox with the OEM filter in and had a play in Photoshop. Here’s the outcome.

Photoshop airboxThe vertical lines show where the filter ends or interferes with the frame or lid. As you can see, the 60mm high PA7180 will squash in at the ends …… will this be enough to restrict air Athena box label for the Capoflow, or will the greater surface area of the larger pleats compensate? Answers on the back of a crisp £20 note if you please! 😀

Next time I’m passing a motor-factors, I’ll order one and have a play. At £4.68 each they’re half the price of the Athena …. and that brings me nicely back onto track, the new Athena filters that turned up today. What are they like then eh?Embossed pleats

Well, dimensionally it’s an exact copy, so the fit is absolutely fine. One nice touch is the embossed pleats. It keeps them evenly separated for better air flow unlike the OEM element that is simply made of folded paper where the pleats can collapse onto each other. The bottom line is that it fits well, looks better constructed and is substantilly cheaper than OEM (€8.35 each from Germany) …… oh and it comes in a nice shiny box!

Let’s all do the Shimmie-Shimmie Shake …..

10mm shim kit ...... and stickers!!!It took the best part of three weeks for the valve shim kit to arrive from the USA ….. and I think that’s rather good, considering the surge of Christmas post whizzing around the world, not to mention the holidays themselves getting in the way.

I’d ordered a Hotcams (SHIM-31) 10mm  shim kit (thickness range: 1.85-3.25mm) that’s sold for the HD V-Rod and Buell 1125, but has a whole bunch of shim sizes in it that suit the Capo, or any V990 motor just fine.

Three shims of each sizeThe V990 engine uses shim sizes from 2.3-3.0mm in 0.025mm increments, so quite a few of the Hotcams kit are redundant, not only that, the kit only contains shims in xx.000mm or xx.050mm sizes, not the xx.025mm and xx.075mm that may be needed. Now this may appear to make the kit a rather poor choice, but look again at what you do get for your money when compared to the shims an Aprilia dealership/stockist will sell you.

So let’s compare ……..

Shim close upHotcams Shim Kit – delivered to Italy was $82.35 / £49.94 / €59.73 including customs duty & taxes. That’s 15 usable shim sizes (x 3 each) and works out at approximately $1.83 / £1.11 /€1.33 per shim. Now compare that with genuine shims from AF1 in the USA – $14.99 each*, or Ultimate Parts in the UK – £9.15-£12.85 each all of course with package and posting on top. I think it’s fair to say that if 50% of the shims are on hand for around 10% of the Aprilia list price …. well I can live with that!

*AF1 do sell a shim kit and it may well be the same one that Hotcams sell. Certainly the range of shims is identical – as is the box by the pictures on the website. Why didn’t I buy from them? Simply price, at $75.99 + $40 shipping, they weren’t even close to Ebay stockist Powersportsplus.

Agip Tec 4 is dead …… long live eni i-Ride

Agip Tec 4 15w-50 Semi-synthetic oilI know, I know ….. engine oil can be the most controversial of all motorbike subjects. So you’ll at least be pleased to know this post isn’t about what oil to use, rather info on changes within Italy (Agip/eni) regarding the originally specified stuff in the handbook.

eni i-Ride PG 15w/50 Semi-synthetic oilIt seems that the original Agip Tec 4 15w-50 as specified by Aprilia is rapidly disappearing off the shelves as it has apparently been withdrawn from production. Along the way it also seems there has been a re-shuffle/re-brand with regards to Agip and eni themselves.

The bottom line appears to be a new line of ‘i-Ride’ oils offered under the eni brand. The one listed as most compatible for the Caponord is the i-Ride PG 15w-50, PG standing for ‘Piaggio Group’ …… apparently the oils were developed and approved in combination with Piaggio. Click on each pic to open the tech sheet … and you’ll see that both oils are in fact virtually identical. So that’s it, just a bit of info just in case you’re every in Italy and need a drop of oil for your bike ……..

Exhaust heat management

Untitled-1Last year I had a look online for exhaust coatings that could possibly help reduce the radiated heat from the Caponord down-pipes. Among the usual rattle-can, cloth-wrap and ceramic paint contenders, I found a link to Zircotec in Oxfordshire. A few emails later and it looked like it would be around the £150-£180 mark to get the Capo’s pipes done. Not cheap granted, but when you read through the claims and list of customers who swear by  the product, you just know they have something unique. Now they are ready to bring a product range specifically for motorcycles to the market. Take a look through the website and be amazed!

Ultimate Parts (UK) discount offer

I’ve just been given this heads-up from Aussie Capo rider and all-round good egg Steve (Precis) about discount offers from those awfully nice folks at Ultimate Parts in Nottingham (UK), take it away Steve ……

Martin at Ultimateparts (http://www.ultimateparts.net/Aprilia-ETV-1000-Capo-Nord-2003-parts.php) can supply sprag clutch parts with massive saving to forum members, e.g. sprag clutch bearing down from £334.00 to £169, alternator windings £169.00; they must email him [[email protected]] and mention my name (Steve) to qualify for the discounts.

Cheers for the info, hope someone finds it useful.